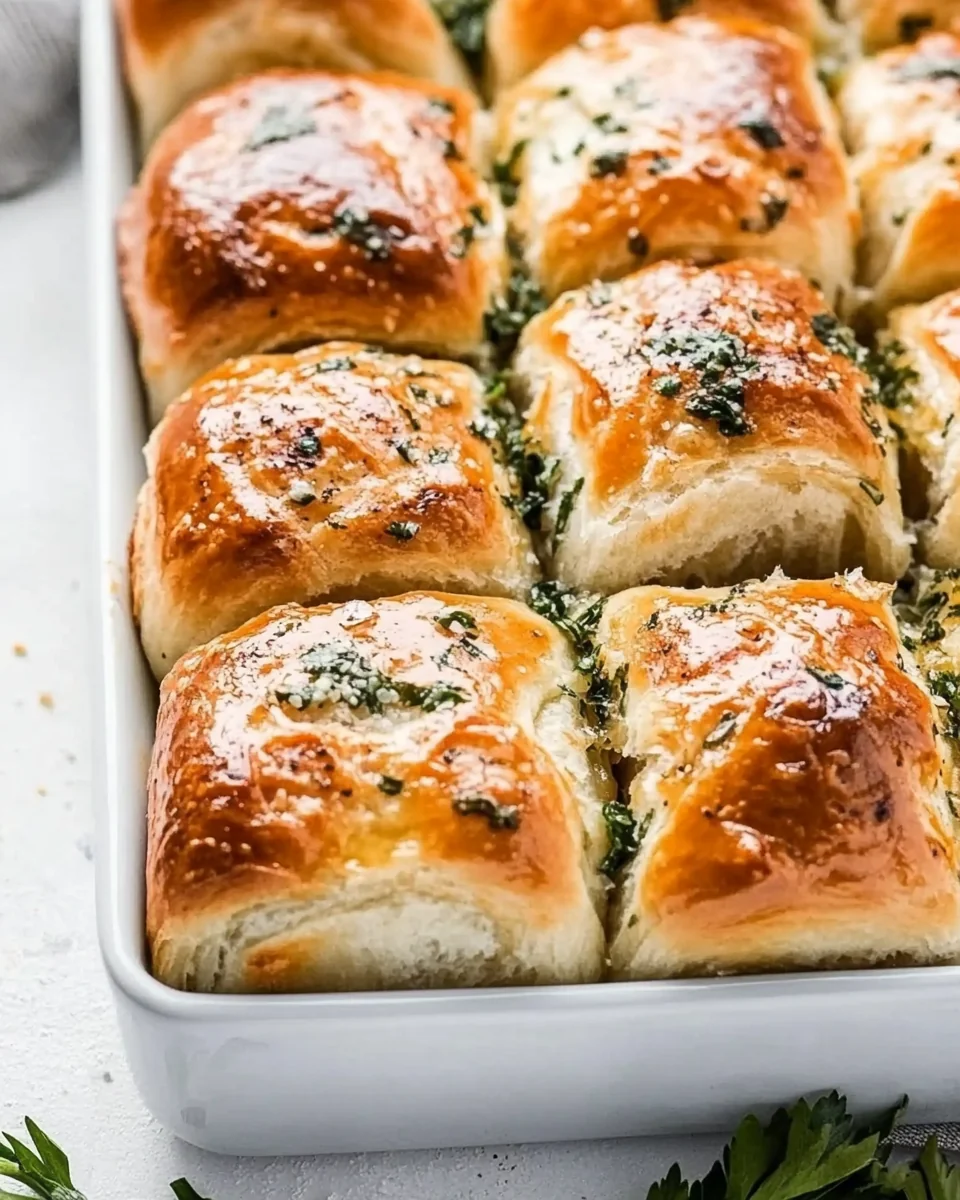
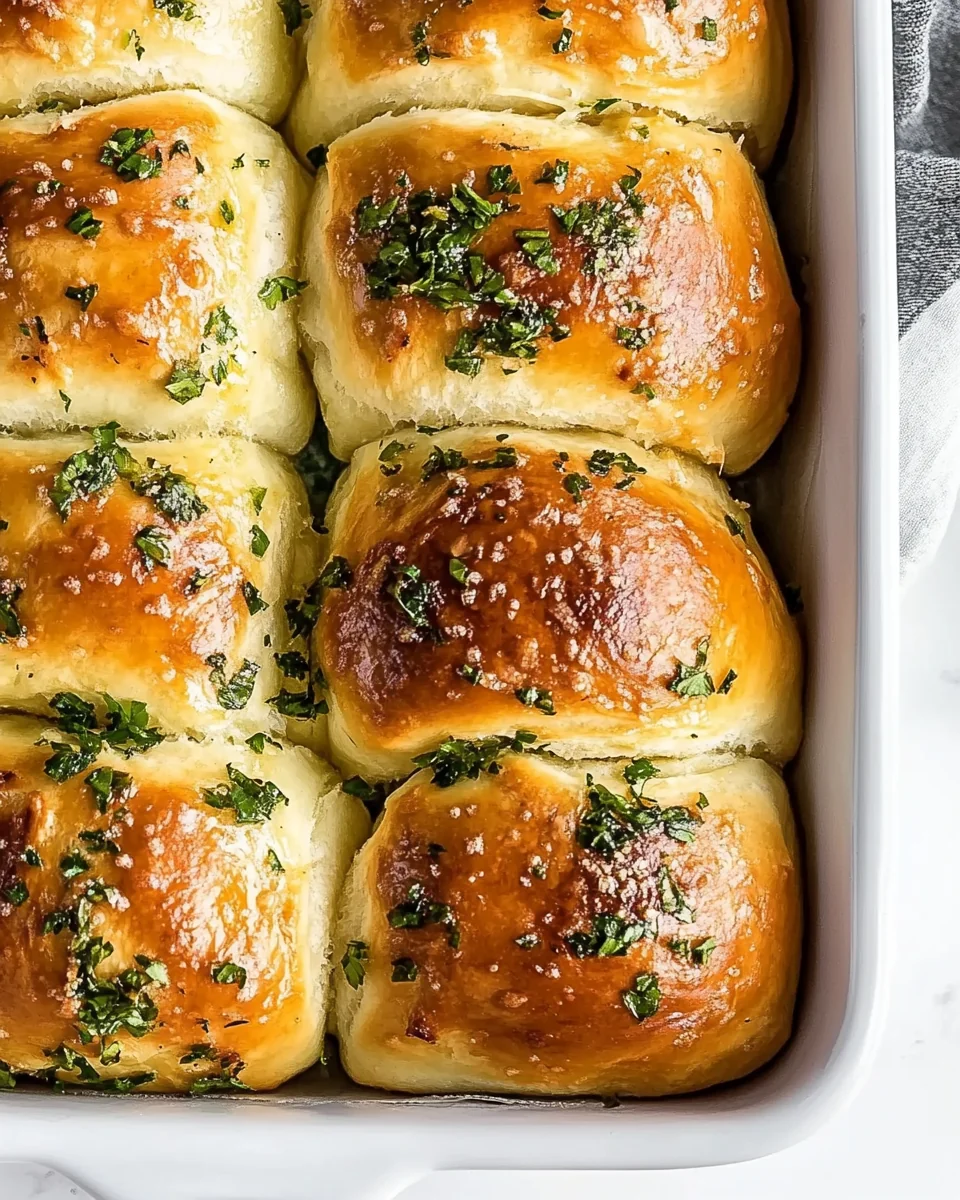
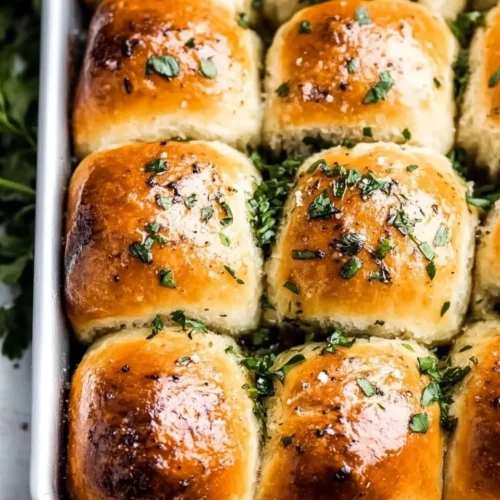
Perfect Homemade Garlic Rolls
Perfect Homemade Garlic Rolls are a delicious, buttery side dish that brings warmth and comfort to any meal. The rich flavors of garlic meld beautifully with soft, fluffy bread, creating an irresistible combination that tantalizes the taste buds. Ideal for weeknight dinners, family gatherings, or festive occasions, these rolls are a crowd-pleaser that pairs well with a variety of dishes. Their standout quality lies in the perfect balance of savory garlic and the soft, pillowy texture of the bread, making them a must-try for any bread lover. Whether served alongside a hearty soup, a salad, or as a delightful appetizer, Perfect Homemade Garlic Rolls elevate any dining experience.
Why You’ll Love This Recipe?
This recipe for Perfect Homemade Garlic Rolls stands out for several reasons. First, the flavor is simply unmatched. Each bite is infused with the aromatic essence of garlic, complemented by a buttery richness that enhances the overall taste. This makes them a perfect accompaniment to a variety of main dishes, ensuring they never go unnoticed on your dinner table. Secondly, the ease of making these rolls is a significant advantage. Even if you are not a seasoned baker, this recipe guides you through each step, making the process accessible and enjoyable. You will be amazed at how simple it is to create bakery-quality rolls in your own kitchen. Additionally, the texture of these rolls is exceptionally appealing. The outside has a beautiful golden-brown crust while the inside remains soft and fluffy, creating a delightful contrast that is satisfying to bite into. Lastly, the versatility of Perfect Homemade Garlic Rolls cannot be overstated. They can be served warm straight from the oven, brushed with extra garlic butter, or even used as a base for sliders, making them suitable for various occasions and preferences.
Ingredients to make The recipe :
To create the perfect batch of Perfect Homemade Garlic Rolls, gather the following ingredients:
- All-Purpose Flour: The foundation of our rolls, all-purpose flour provides the necessary structure and elasticity. Approximately 4 cups are needed, which will give the rolls a light and fluffy texture when baked. Be sure to sift the flour before measuring to avoid any lumps and ensure even mixing.
- Active Dry Yeast: About 2 and 1/4 teaspoons of active dry yeast is required to leaven the rolls. This ingredient is essential for creating the airy texture of the rolls, as it ferments and produces carbon dioxide, causing the dough to rise. Ensure the yeast is fresh for the best results.
- Warm Water: Approximately 1 and 1/2 cups of warm water is needed to activate the yeast. The water temperature should be around 110°F (43°C) to ensure optimal activation without killing the yeast.
- Granulated Sugar: Adding about 2 tablespoons of granulated sugar provides nourishment for the yeast and helps achieve a golden crust during baking. It balances the flavors in the rolls without making them overly sweet.
- Salt: About 1 teaspoon of salt enhances the overall flavor of the rolls. It is crucial to balance the sweetness and richness of the dough, ensuring a well-rounded taste.
- Unsalted Butter: You will need 1/2 cup of melted unsalted butter for both the dough and brushing on top after baking. The butter adds richness and flavor, creating a tender roll. Using unsalted butter allows you to control the salt content more effectively.
- Garlic: Freshly minced garlic, about 4 cloves, is essential for infusing the rolls with that signature garlic flavor. The more garlic, the more aromatic and flavorful the rolls will be, providing a wonderful fragrance while baking.
- Parsley: Chopped fresh parsley, approximately 2 tablespoons, is optional but adds a lovely pop of color and freshness to the rolls. It can also enhance the garlic flavor, creating a beautiful presentation.
How to Make Perfect Homemade Garlic Rolls ?

To make Perfect Homemade Garlic Rolls, follow these detailed steps:
- Start by activating the yeast. In a small bowl, combine the warm water and sugar, stirring gently until dissolved. Sprinkle the active dry yeast over the top and let it sit for about 5 to 10 minutes, or until it becomes frothy. This indicates that the yeast is alive and ready to use.
- In a large mixing bowl, combine the all-purpose flour and salt. Make a well in the center and pour in the activated yeast mixture along with the melted unsalted butter. Mix with a wooden spoon or a dough hook attachment until a shaggy dough forms.
- Turn the dough out onto a lightly floured surface. Knead the dough for about 8 to 10 minutes until it becomes smooth and elastic. This step is crucial as it develops the gluten, which contributes to the structure of the rolls.
- Place the kneaded dough in a lightly greased bowl. Cover it with a clean kitchen towel or plastic wrap and let it rise in a warm, draft-free area for about 1 to 1.5 hours, or until it has doubled in size.
- Once the dough has risen, punch it down gently to release the air. Turn it out onto a floured surface again and knead in the minced garlic and chopped parsley until evenly distributed throughout the dough.
- Divide the dough into equal portions, about 12 to 15 pieces, depending on how large you want your rolls. Shape each piece into a ball by tucking the edges underneath to create a smooth top.
- Arrange the shaped rolls in a greased baking dish or on a lined baking sheet, leaving some space between each roll for expansion. Cover them again with a kitchen towel and allow them to rise for another 30 to 45 minutes until puffy.
- Preheat your oven to 375°F (190°C) during the last 15 minutes of the second rise. This ensures that the rolls go into a hot oven, promoting a good rise.
- Once the rolls have risen, bake them in the preheated oven for about 20 to 25 minutes or until they are golden brown on top. The aroma of garlic and freshly baked bread will fill your kitchen, creating an irresistible atmosphere.
- While the rolls are baking, prepare the garlic butter by melting the remaining butter and mixing in additional minced garlic and a pinch of salt. This will be brushed on the rolls as soon as they come out of the oven.
- Once baked, remove the rolls from the oven and immediately brush them generously with the garlic butter mixture. This extra step enhances the flavor and gives a beautiful sheen to the rolls.
- Allow the rolls to cool slightly before serving. Enjoy them warm, either on their own, or as a side to your favorite dishes for a truly satisfying experience.
Tips for Variations:
When making Perfect Homemade Garlic Rolls, consider these creative variations to elevate your dish:
- For a cheesy twist, add shredded mozzarella or cheddar cheese into the dough during mixing. This will create gooey pockets of cheese that melt beautifully while baking, enhancing the overall flavor and texture.
- Experiment with herbs by incorporating dried Italian herbs or fresh rosemary into the dough. These additions provide aromatic depth and can complement a variety of main courses, making the rolls even more enticing.
- For a spicy kick, add a pinch of red pepper flakes to the garlic butter mixture before brushing it on the rolls. This will give your Perfect Homemade Garlic Rolls an unexpected heat that pairs wonderfully with creamy soups and salads.
- Try using different types of flour, such as whole wheat or bread flour, for a unique texture and flavor. Whole wheat flour adds a nuttier taste, while bread flour enhances the chewiness of the rolls.
- For a sweet variation, consider adding cinnamon and sugar to the dough for a dessert-like roll. Once baked, you can serve them drizzled with honey or a cream cheese frosting for a delightful treat.
- Make mini garlic rolls by dividing the dough into smaller portions before shaping. These bite-sized versions are perfect for appetizers or snacks and are great for serving at parties.
- Incorporate roasted garlic into the dough instead of raw minced garlic for a sweeter, more mellow flavor. Roasted garlic provides a rich, caramelized taste that will elevate your rolls to the next level.
- Top your rolls with everything bagel seasoning before baking for an extra crunch and flavor boost. This combination of seeds and spices adds a delightful texture and savory note to your Perfect Homemade Garlic Rolls.
Serving Suggestions:
To serve your Perfect Homemade Garlic Rolls, consider these detailed suggestions:
- Pair them with a warm bowl of soup, such as chicken noodle or minestrone, to create a comforting meal perfect for chilly evenings. The soft rolls are ideal for dipping and soaking up the broth.
- Serve the rolls alongside a fresh salad, like a Caesar or Greek salad, to add a hearty element to a light meal. The flavors of garlic and butter complement the freshness of the greens beautifully.
- These rolls are also an excellent choice for festive occasions such as Ramadan Iftar. Their warm, inviting aroma will enhance the celebratory atmosphere as friends and family gather around the table.
- Store leftover rolls in an airtight container at room temperature for up to 2 days. For longer storage, freeze them in a resealable bag for up to 3 months, ensuring you can enjoy them anytime.
- Garnish with extra chopped parsley or freshly grated Parmesan cheese before serving for an added touch of elegance and flavor. This simple addition can elevate the presentation and make your rolls even more appealing.
- For a more casual serving option, place the rolls in a basket lined with a cloth napkin. This rustic presentation invites guests to help themselves and creates a warm, homey feeling.
- Consider serving these rolls with a variety of dips, such as hummus or tzatziki, for an interactive appetizer at gatherings. This encourages sharing and adds a fun element to the meal.
- Enjoy your rolls as a base for sliders by slicing them in half and filling them with your favorite ingredients, such as grilled vegetables or falafel. This makes for a delightful twist on traditional sandwiches.
FAQ:
How do I store leftovers?
To store leftover Perfect Homemade Garlic Rolls, place them in an airtight container at room temperature for up to 2 days. For longer storage, you can freeze them in a resealable plastic bag, ensuring they are well-sealed to prevent freezer burn. Simply thaw and reheat before serving.
Can I freeze this recipe?
Yes, you can freeze Perfect Homemade Garlic Rolls. After baking and cooling, place them in a freezer-safe bag or container. They can be stored in the freezer for up to 3 months. To enjoy, thaw them at room temperature and reheat in the oven for a few minutes.
What can I serve with garlic rolls?
Many dishes pair wonderfully with Perfect Homemade Garlic Rolls. They complement soups, salads, and main courses like grilled chicken or roasted vegetables. Additionally, they can be served as an appetizer with dips or spreads for a more casual setting.
Can I make these rolls ahead of time?
Yes, you can prepare the dough for Perfect Homemade Garlic Rolls ahead of time. After the first rise, shape the rolls and place them in the baking dish. Cover and refrigerate them for up to 24 hours. Let them come to room temperature and rise before baking.
What if my rolls don’t rise?
If your Perfect Homemade Garlic Rolls don’t rise, it may be due to inactive yeast. Ensure your yeast is fresh and activated properly by checking for frothiness in warm water. If the dough doesn’t rise, it could also be too cold; try placing it in a warmer environment for better results.
Perfect Homemade Garlic Rolls
Equipment
- Mixing Bowl
- Baking Dish
- Wooden Spoon
Ingredients
Dry Ingredients
- 4 cups All-Purpose Flour Sift before measuring.
- 2.25 teaspoons Active Dry Yeast Ensure yeast is fresh.
- 1.5 cups Warm Water Temperature should be around 110°F (43°C).
- 2 tablespoons Granulated Sugar Nourishes the yeast.
- 1 teaspoon Salt Enhances flavor.
- 0.5 cups Unsalted Butter Melted, for dough and brushing.
Wet Ingredients
- 4 cloves Garlic Freshly minced.
- 2 tablespoons Chopped Fresh Parsley Optional for garnish.
Instructions
- 1. Activate the yeast by combining warm water and sugar in a small bowl. Sprinkle yeast on top and let sit for 5-10 minutes until frothy.
- 2. In a large mixing bowl, combine flour and salt. Make a well in the center and add the activated yeast mixture and melted butter. Mix until a shaggy dough forms.
- 3. Knead the dough on a floured surface for 8-10 minutes until smooth and elastic.
- 4. Place the dough in a greased bowl, cover, and let rise in a warm area for 1-1.5 hours until doubled in size.
- 5. Punch down the dough, knead in minced garlic and parsley, then divide into 12-15 pieces and shape into balls.
- 6. Arrange rolls in a greased baking dish, cover, and let rise for another 30-45 minutes until puffy.
- 7. Preheat oven to 375°F (190°C) during the last 15 minutes of rising.
- 8. Bake rolls for 20-25 minutes until golden brown.
- 9. Prepare garlic butter by melting remaining butter and mixing in additional minced garlic and a pinch of salt. Brush on rolls immediately after baking.
- 10. Allow rolls to cool slightly before serving warm.