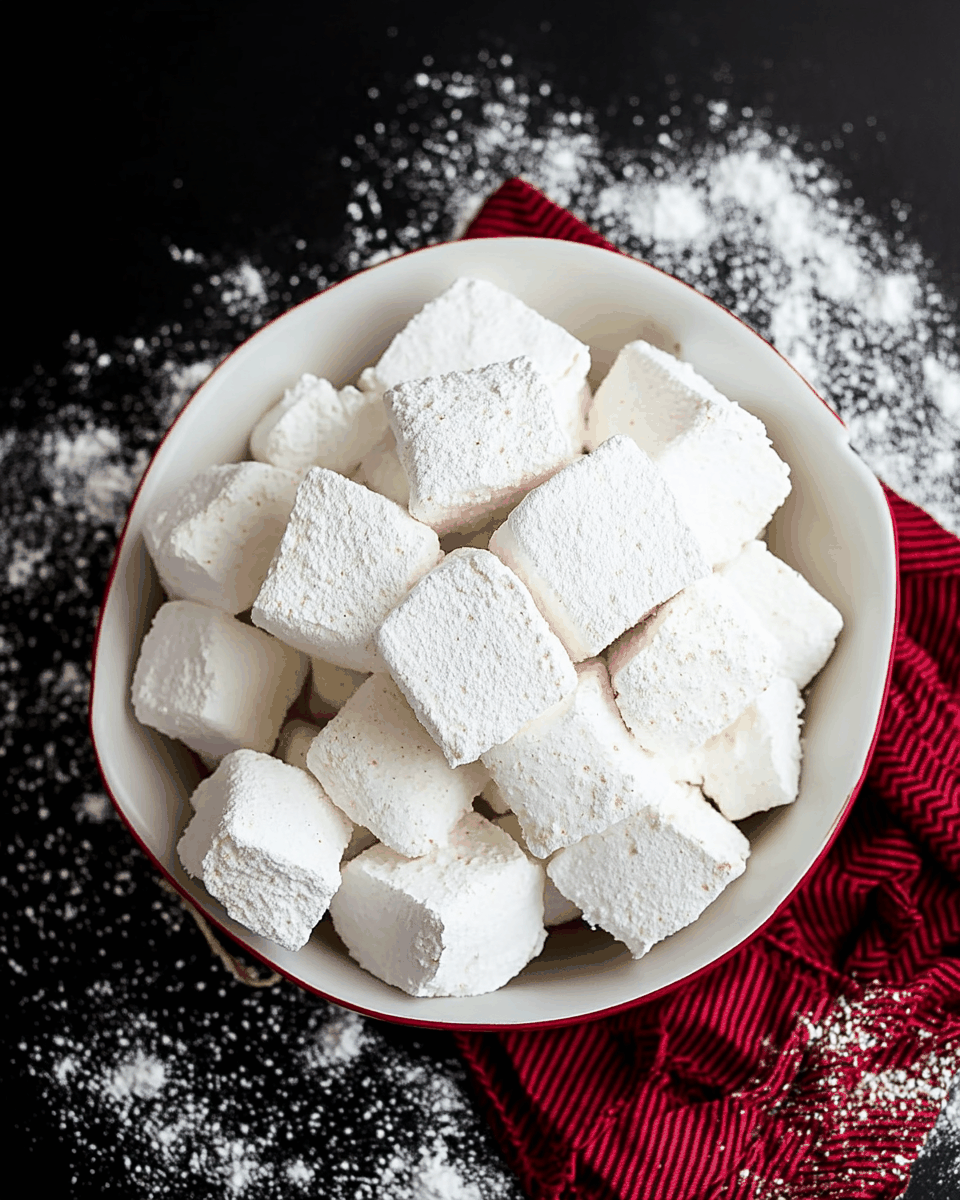
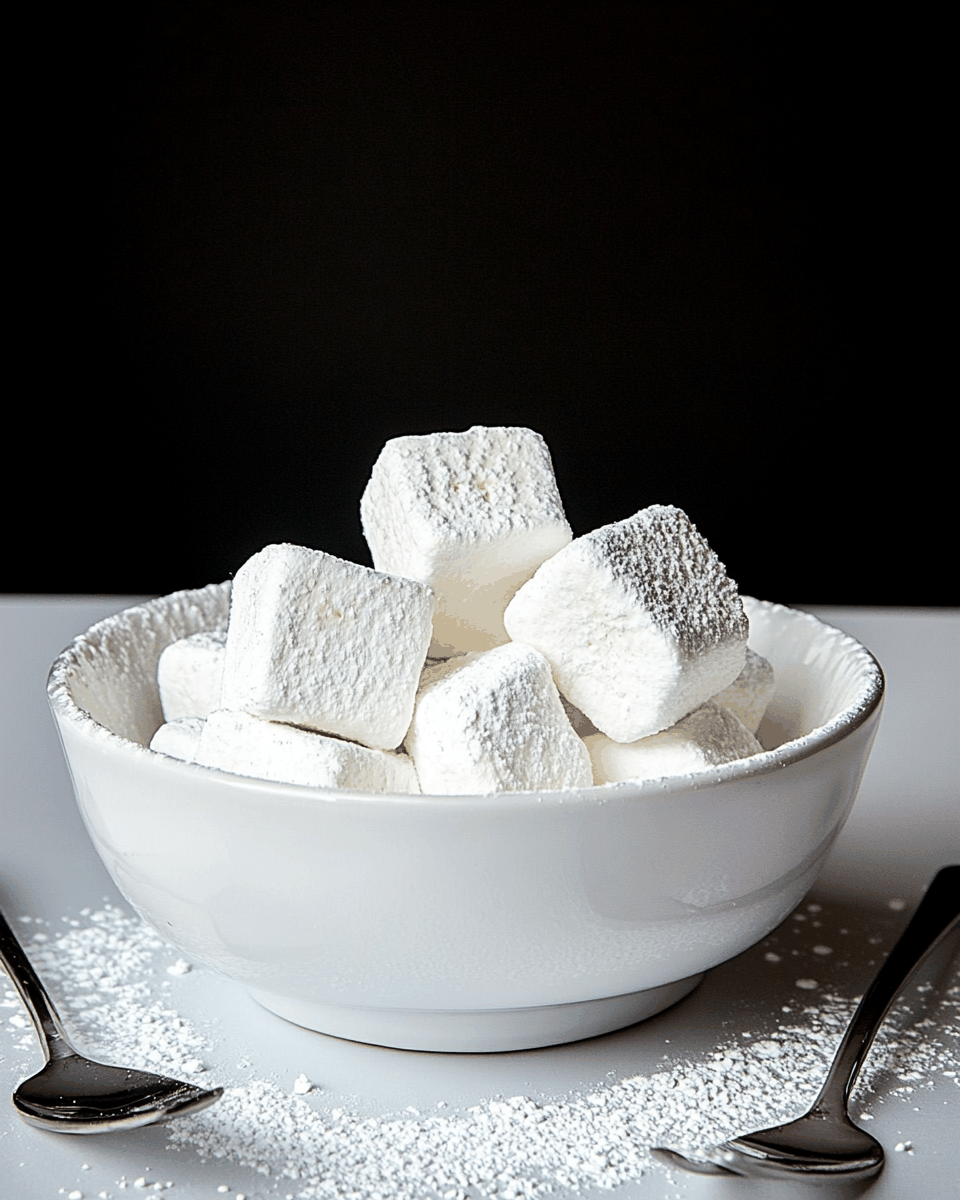
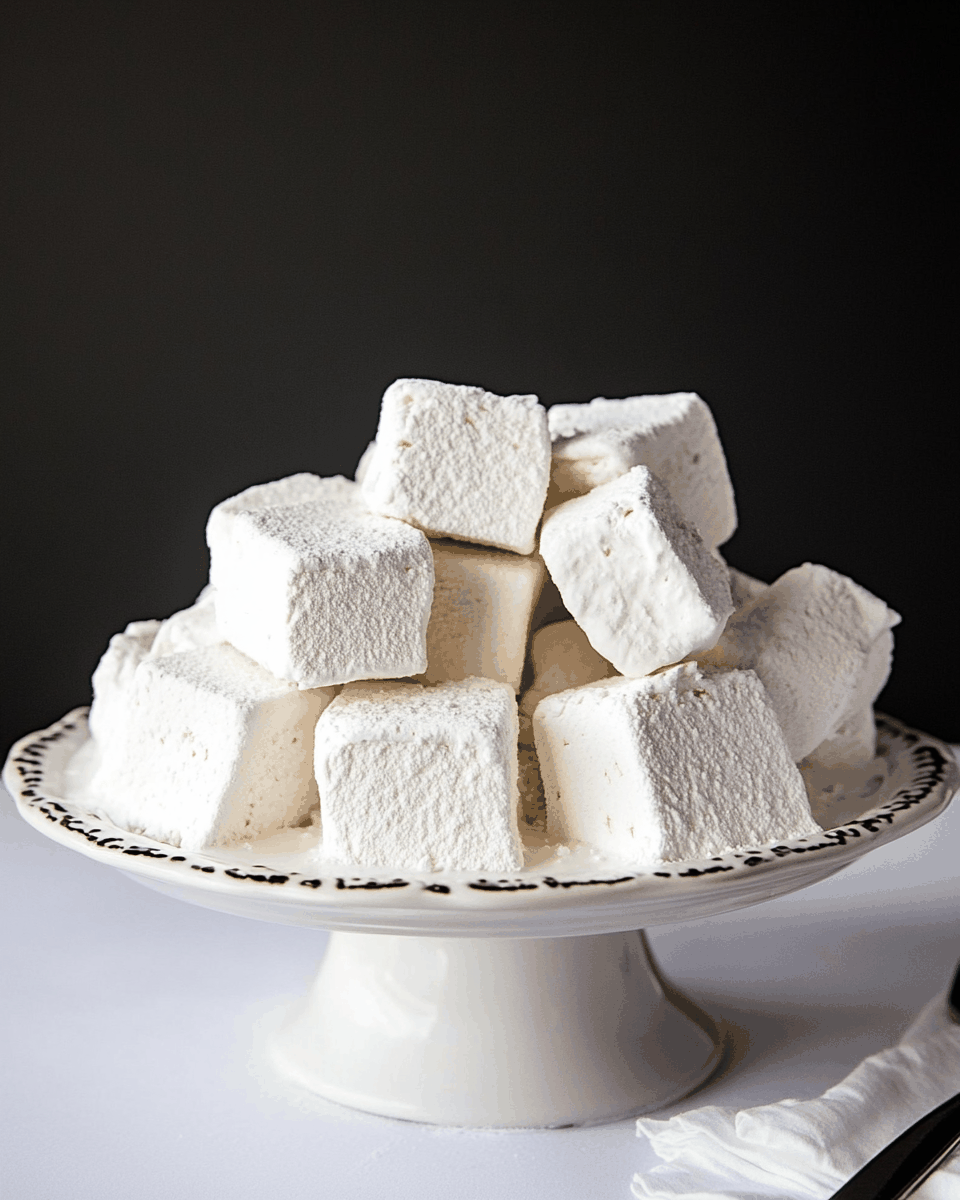
Homemade Marshmallows
Homemade marshmallows are a sweet treat that can elevate any dessert, from hot cocoa to s’mores. Unlike store-bought versions, these fluffy, pillowy delights offer a fresh taste and texture that is simply unmatched. The process of making marshmallows at home may seem daunting, but with a few basic ingredients and some patience, you can create a batch that rivals any gourmet confection. With a soft, cloud-like consistency and the ability to customize flavors and shapes, homemade marshmallows are perfect for special occasions or simply for satisfying a sweet tooth. Whether you choose to dip them in chocolate, toast them over a fire, or enjoy them plain, these marshmallows will be a hit with family and friends. Plus, the satisfaction of creating something so beloved from scratch is an experience that every home cook should try at least once. Get ready to explore the world of homemade marshmallows, where creativity knows no bounds and every bite is a little piece of heaven.
Why You’ll Love This Recipe?
There are numerous reasons to adore homemade marshmallows, and they start with flavor. Unlike mass-produced marshmallows that can taste overly sweet or artificial, homemade versions allow you to control the sweetness and add natural flavors. Imagine the essence of vanilla or a hint of mint, perfectly complementing the fluffy texture. Additionally, the preparation process is surprisingly simple. With just a few kitchen tools and minimal cooking skills, you can achieve impressive results that will leave friends and family in awe. The visual appeal of homemade marshmallows is another highlight. They can be cut into squares or shaped into fun designs, then dusted with powdered sugar or cocoa for an elegant finish. The sheer joy of presenting a homemade treat that looks as good as it tastes is a rewarding experience. Lastly, making marshmallows at home opens the door to endless customization. You can experiment with colors, flavors, and even toppings, making each batch uniquely yours. This recipe invites you to unleash your creativity and enjoy the sweet rewards of your efforts.
Ingredients:
Creating homemade marshmallows requires a select few ingredients that are easy to find and combine. Below is a complete list of what you’ll need, along with detailed descriptions to ensure you select the best options for your marshmallows:
- 1 cup water, divided: This acts as the primary liquid for dissolving the sugar and helps create the marshmallow texture.
- 2 cups granulated sugar: The main sweetener in this recipe, granulated sugar not only provides sweetness but also contributes to the structure of the marshmallows.
- 1 cup light corn syrup: This syrup adds sweetness and helps prevent the sugar from crystallizing, ensuring a smooth, soft marshmallow.
- 1 tablespoon pure vanilla extract: While vanilla is commonly used, you can replace it with other extracts to customize the flavor. Pure vanilla enhances the overall taste and aroma.
- 2 tablespoons powdered sugar: This is used for dusting the marshmallows, preventing them from sticking together once cut.
- 2 tablespoons cornstarch: Similar to powdered sugar, cornstarch helps absorb moisture and keeps the marshmallows from becoming too sticky.
- 1/2 teaspoon salt: A small amount of salt balances the sweetness and enhances the flavors.
- 1 1/2 tablespoons unflavored powdered gelatin: This is the key ingredient that provides structure and gives marshmallows their iconic chewy texture. Be sure to use a gelatin that is suitable for your dietary needs.
When selecting your ingredients, always opt for high-quality products to achieve the best results. Fresh ingredients will enhance the flavor and texture of your marshmallows. For instance, using pure vanilla extract instead of imitation vanilla will result in a more aromatic and flavorful treat. Additionally, ensure that your gelatin is unflavored and food-safe, as it is crucial for the marshmallow’s structure. The combination of sugar, corn syrup, and gelatin creates the perfect blend for achieving that light and airy mouthfeel that everyone loves. Once you have gathered these ingredients, you’re ready to embark on your homemade marshmallow journey!
How To Make Homemade Marshmallows?
Now that you have your ingredients ready, it’s time to dive into the process of making homemade marshmallows. Follow these detailed steps to ensure success:
- Prepare the pan: Start by greasing a 9×13-inch baking dish with a light coating of vegetable oil or cooking spray. This will help prevent the marshmallows from sticking to the pan. Dust the bottom and sides with a mixture of powdered sugar and cornstarch. This step is essential for easy removal once the marshmallows are set.
- Bloom the gelatin: In a small bowl, combine 1/2 cup of cold water with the unflavored powdered gelatin. Stir gently to ensure the gelatin absorbs the water, then set it aside for about 5-10 minutes. This process, known as blooming, is crucial for activating the gelatin.
- Cook the sugar mixture: In a medium saucepan, combine the remaining 1/2 cup of water, granulated sugar, light corn syrup, and salt. Place the saucepan over medium heat and stir until the sugar is fully dissolved. Once dissolved, stop stirring and allow the mixture to come to a boil. Use a candy thermometer to monitor the temperature, aiming for 240°F (soft-ball stage).
- Add the bloomed gelatin: Once the sugar mixture reaches the correct temperature, remove it from the heat. Carefully stir in the bloomed gelatin mixture until fully dissolved. The heat will melt the gelatin, blending it smoothly into the syrup.
- Whip the mixture: Transfer the sugar and gelatin mixture to a large mixing bowl or the bowl of a stand mixer. Add the pure vanilla extract. Using an electric mixer with a whisk attachment, begin whipping the mixture on low speed, gradually increasing to high speed. Whip for about 10-15 minutes until the mixture becomes thick, glossy, and triples in volume. The marshmallow mixture should form stiff peaks.
- Transfer to the prepared pan: Quickly pour the whipped marshmallow mixture into the prepared baking dish. Use a spatula to spread it evenly, smoothing the top if needed. Be cautious, as the mixture is sticky and can be quite hot.
- Set the marshmallows: Allow the marshmallows to set at room temperature for at least 4 hours or overnight. This resting period is essential for the marshmallows to firm up and achieve the desired texture.
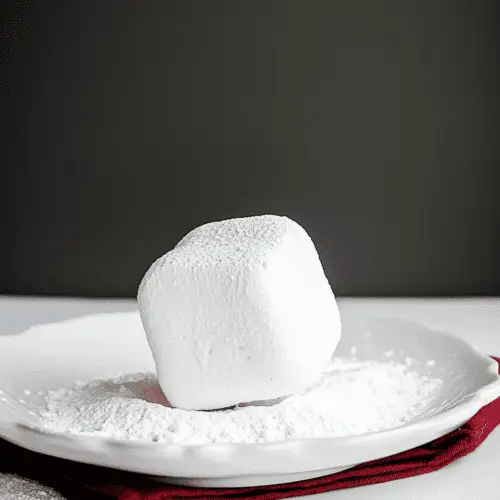
- Cut and dust: Once set, dust a clean surface with a mixture of powdered sugar and cornstarch. Turn the marshmallow slab out onto the surface and cut it into squares or desired shapes using a sharp knife or pizza cutter. Dust the cut sides with more powdered sugar and cornstarch to prevent sticking.
- Store or serve: Enjoy your homemade marshmallows right away or store them in an airtight container at room temperature for up to two weeks. They can also be frozen for longer storage. Just remember to separate layers with parchment paper to prevent sticking.
Tips For Variations:
One of the best aspects of homemade marshmallows is the ability to customize them according to personal taste preferences and creativity. Here are some unique tips for variations that can elevate your marshmallow-making experience:
- Flavor Infusions: Beyond vanilla, consider adding other flavorings. Citrus zest, like lemon or orange, can give a refreshing twist. You can also experiment with extracts such as almond, hazelnut, or coconut for a unique flavor profile. Just remember to adjust the amount based on the strength of the extract.
- Colorful Creations: Adding food coloring can make your marshmallows visually stunning. Use gel food colors for vibrant results that won’t alter the marshmallow’s texture. Swirl different colors into the mixture for a marbled effect or create themed colors for special occasions.
- Chocolate Dipped Marshmallows: For a decadent treat, melt some chocolate and dip the cut marshmallows halfway into the chocolate. Allow them to set on parchment paper, and for an added touch, sprinkle crushed nuts or sprinkles on top before the chocolate hardens.
- Toasted Marshmallows: If you enjoy a smoky flavor, you can toast your marshmallows over an open flame. Skewer them on sticks and hold them over a campfire or use a kitchen torch for toasting. The caramelization adds depth and enhances the overall taste.
- Flavored Sugars: For a unique dusting, consider mixing powdered sugar with flavored powders. For example, using cocoa powder for a chocolate dust, or adding ground cinnamon for a spiced touch can elevate the taste profile of your marshmallows.
- Miniature Versions: If you’re looking for a fun twist, try making mini marshmallows. Simply adjust the cutting technique to create smaller squares or use a small cookie cutter to form them into shapes. These bite-sized treats are perfect for topping desserts or snacking.
- Gourmet S’mores: Use your homemade marshmallows in gourmet s’mores by pairing them with artisanal graham crackers and high-quality chocolate. You can even create layered s’mores with flavored marshmallows and various chocolates for a truly indulgent experience.
Serving Suggestions:
- Classic Hot Cocoa: Serve your marshmallows atop a steaming cup of hot cocoa. As they melt into the warm beverage, they add a delightful sweetness and creaminess. For a fun twist, consider using flavored hot chocolate mixes.
- Marshmallow Treats: Use your homemade marshmallows to create marshmallow treats by melting them with butter and combining them with crispy rice cereal. Press the mixture into a pan, allow it to set, and then cut into squares for a nostalgic treat.
- Festive Desserts: Incorporate marshmallows into desserts for added flair. Use them as a topping for cakes, cupcakes, or pies. You can even layer them in a trifle with whipped cream and fruit for a visually appealing dessert.
- Ice Cream Toppings: Chop the marshmallows into smaller pieces and mix them into your favorite ice cream or use them as a topping. They add a unique texture and sweetness, making your sundae even more enjoyable.
- Gifts and Party Favors: Package your homemade marshmallows in decorative bags or jars to give as gifts. They make wonderful party favors for birthdays, weddings, or any special celebration. Consider personalizing the packaging for an extra special touch.
- Campfire Treats: Bring back the nostalgia of camping by roasting your marshmallows over an open flame for s’mores or simply enjoying them plain. This classic preparation method allows their sweetness to shine through while adding a smoky flavor.
- Flavor Pairing: Pair your marshmallows with various accompaniments such as fresh fruits, nuts, or flavored syrups. Create a fun dessert bar where guests can build their treats with different combinations.
FAQ:
Can I use a different type of sweetener instead of granulated sugar?
While granulated sugar is crucial for achieving the right texture, other sweeteners may not provide the same results. If you prefer alternatives, consider researching specific recipes that cater to those sweeteners.
How long do homemade marshmallows last?
Homemade marshmallows can last up to two weeks when stored in an airtight container at room temperature. For longer storage, they can be frozen for up to three months, but be sure to separate layers with parchment paper.
Can I make marshmallows without gelatin?
Traditional marshmallows rely on gelatin for their texture. However, there are vegan alternatives available that use agar-agar or other plant-based gelling agents. Look for specific recipes designed for these substitutes.
What is the best way to cut marshmallows?
To cut marshmallows easily, dust your knife or pizza cutter with powdered sugar and cornstarch. This will prevent sticking and allow for clean cuts. Additionally, a sharp knife or a pizza cutter works best for even squares.
How do I store homemade marshmallows?
Store homemade marshmallows in an airtight container at room temperature, layered with parchment paper to prevent sticking. Avoid refrigeration, as moisture can change their texture. Enjoy the soft, fluffy texture for the best experience!
Homemade Marshmallows
Equipment
- Mixing Bowl
- Saucepan
- Candy Thermometer
- Electric Mixer
- Baking Dish
Ingredients
Ingredients
- 1 cup Water, divided This acts as the primary liquid for dissolving the sugar.
- 2 cups Granulated sugar Provides sweetness and structure.
- 1 cup Light corn syrup Adds sweetness and prevents crystallization.
- 1 tablespoon Pure vanilla extract Enhances the overall taste and aroma.
- 2 tablespoons Powdered sugar Used for dusting to prevent sticking.
- 2 tablespoons Cornstarch Helps absorb moisture and keeps marshmallows from sticking.
- 1/2 teaspoon Salt Balances sweetness and enhances flavors.
- 1 1/2 tablespoons Unflavored powdered gelatin Provides structure and chewy texture.
Instructions
- Prepare the pan: Grease a 9x13-inch baking dish and dust with powdered sugar and cornstarch.
- Bloom the gelatin: Combine 1/2 cup of cold water with gelatin and let it sit for 5-10 minutes.
- Cook the sugar mixture: In a saucepan, combine remaining water, sugar, corn syrup, and salt. Heat until dissolved, then boil to 240°F.
- Add the bloomed gelatin: Stir the gelatin mixture into the hot sugar mixture until dissolved.
- Whip the mixture: Transfer to a mixing bowl, add vanilla, and whip until thick and glossy.
- Transfer to the prepared pan: Pour the mixture into the baking dish and smooth the top.
- Set the marshmallows: Allow to set at room temperature for at least 4 hours or overnight.
- Cut and dust: Dust a surface with powdered sugar and cornstarch, turn out the marshmallow slab, and cut into squares.
- Store or serve: Enjoy immediately or store in an airtight container for up to two weeks.